Introduction and Rationale
In a previous post, I wrote about many of the general characteristics of working with Corian as a pen making material. That post came about as a result of a project in which I decided to make a batch of 36 pens using Corian blanks and Slimline pen kits from two vendors: Woodcraft and Craft Supply USA. The kits were essentially identical, although there was an extremely slight difference in the length of the brass tubes. This difference had no effect in the assembly of the pens however as the blanks were mixed by accident although I had kept the blanks for each manufacturer separate initially. So goes one of the risks of a shared shop space. My motive in making this batch of pens was simply to use the kits. I had purchased them years before and as I had the kits and I had the Corian I went with it. I don’t have any more Slimline pen kits but I still have a great deal of Corian, so mission partially accomplished. In what will be a series of 9 consecutive posts, I intend to discuss in detail each discrete step in the process of making this batch of Corian pens. I hope you enjoy this in-depth look at the pen making process in general, and the use of Corian as a material in specific.
The Purpose of End Milling
Once the glue has dried and the brass tubes are completely secure, it is time to mill both ends of the blanks. The purpose of end milling is to ensure that the ends of the blank are absolutely square and flat. This allows the pen hardware to fit correctly and flush with the blanks. End milling is an essential step in the pen making process. Of course, every step has to be completed correctly but I stress the importance of end milling because if the milling is not done correctly and completely, no matter how wonderfully the pen maker completes every other step, the pen will either not work or it will be ugly.
End Milling Methods – Belt/Disc Sander
There are several methods that can be employed for end milling. One method that doesn’t require otherwise specialty tools is to use a belt or disc sander. The ends of the blank are simply sanded down until flat. In theory, provided you have a belt/disc sander, this sounds easy. But, I have tried it and it was a disaster. Unless the table on your belt sander is 100% flat and steady this method is hazardous at best. Even if the belt sander has been positioned in the downward position and the blank is held down from above, instead of from the side, the less than perfect flatness of the sand paper itself can damage your blank beyond repair. I know this because I have had it happen with a pink ivory blank, no less. Now, if you are using this method successfully, then feel free to claim I am full of dog poop and move on. However, I personally don’t trust this method and mention it here as something to avoid.

The End Mill Tool
The best, and in my experience, correct way to end mill pen blanks is with an end mill tool. This small tool comes in two parts; the cutter head and the shaft. The cutter head is attached to the shaft with a small screw that is turned with an equally small Allen wrench or hex key. Because the cutter head is intended to cut the blank material, I routinely sharpen my cutter heads with small handled diamond sharpening plates. The process is quick, easy, and I think essential. A dull cutter head could simply rip you nice blank apart before you even have a chance to mount it on the lathe. All cutting tools, unless the bits or blades are replaceable, must be kept sharp at all times to prevent injury to you and/or disaster for your materials.
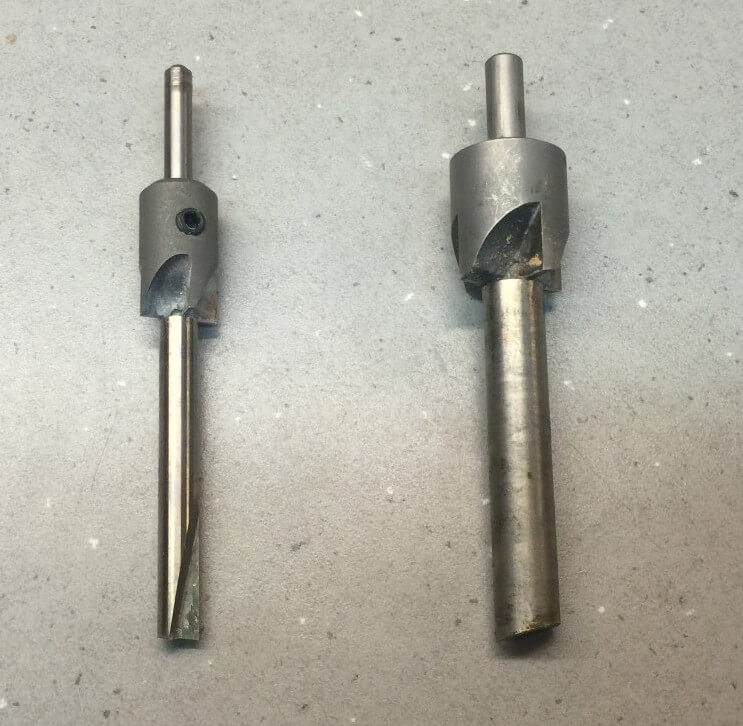
Small and Large End Mill Cutter Heads on Shafts
Cutter Head Sizing
You will notice in the photo that I have two cutter heads. The small one is specially designed for use with the smallest of blanks, such as the very small Corian blanks. If the larger cutter head is used with small blanks, more caution is necessary to prevent damage to a small blank. Given that the cutter heads are not insanely expensive and given that one cutter head will usually fit a variety of shafts, it seems like a good investment to me to have a small one and a large one.
Different End Mill Systems/Brands
Some cutter head and shaft systems are not interchangeable between brands so be careful if you plan to add shafts, or cutter heads, to an existing system. The key element will be the size of the spindle on the shaft and the size of the bore in the cutter head. Some makers use exceptionally small sizes for both so that you have to buy all new shafts if you purchase one of their cutter heads. If buying in person check carefully by taking your existing tools with you. If you are buying on-line, look for specific measurements or photos accurate enough for you to be reasonably sure your existing items will work with the new ones.
End Mill Shafts and Glue Removal
The shafts are designed to be inserted into the brass tube to stabilize the blank while the ends are milled but also to help clear excess glue from inside the tube by scraping it off. You may recall from the post on gluing that I use long cotton swabs and acetone to remove excess glue from my brass tubes prior to milling, but even if you didn’t do that, the shaft should remove most of the glue.

Gluing Supplies
The shafts come in different sizes to better accommodate the wide range of circumferences found in pen making brass tubes. I have many different sizes but always known that even the most complete collection of milling shafts probably won’t provide an exact fit for every situation. Therefore, be prepared with some additional means of removing any remaining glue if you have to. Prevention is easier than cure in this respect, hence the cotton swabs and acetone during the glue stage, but if necessary you can remove dried cyanoacrylate using the same means, but it will take a great deal longer. And yes, the glue needs to be removed because the pen hardware is a tight fit and any remaining excess glue will prevent or inhibit the correct fitting of the hardware.
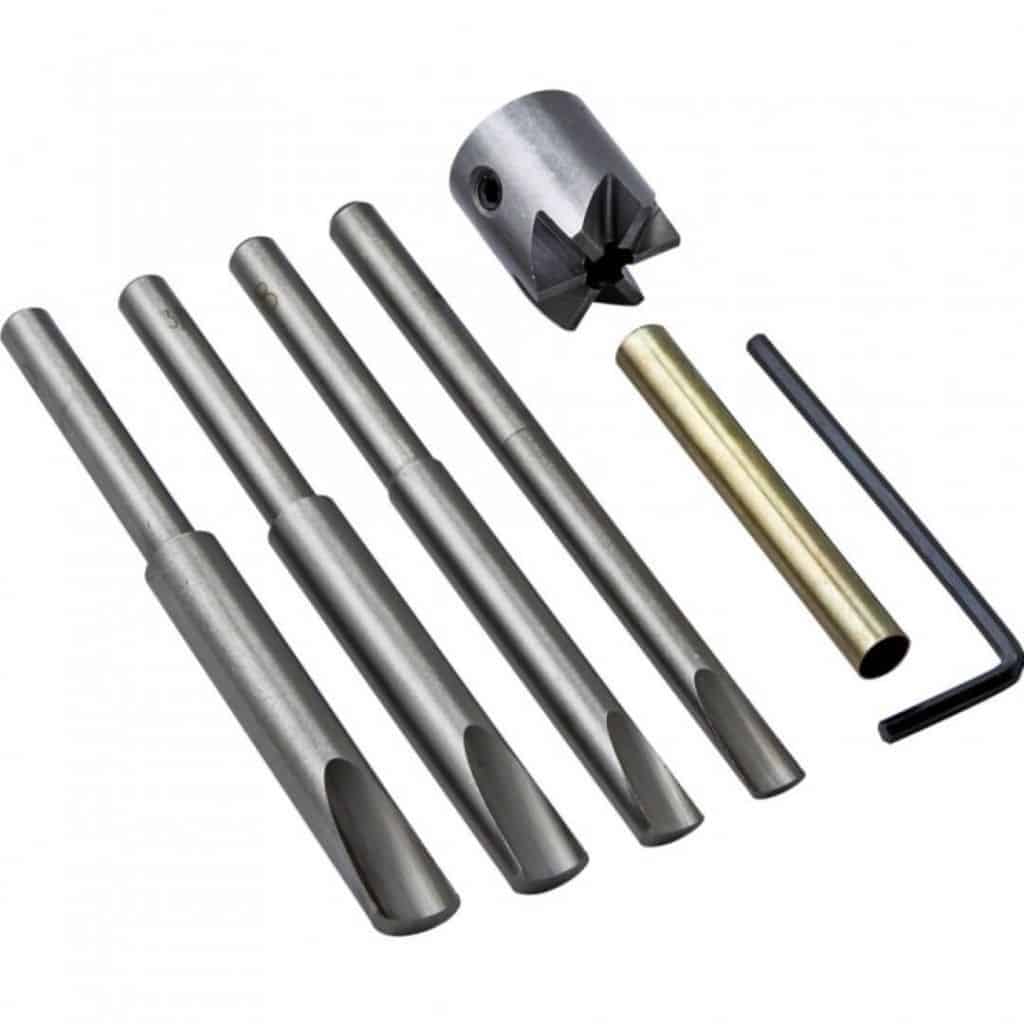
End Mill Cutter Head with Assorted Shafts
End Milling with Hand Power
The first time I milled pen blanks I did it with hand power and there is nothing wrong with this method provided that your blanks are cut very close indeed to the final required length. When I used hand power, the mill shaft and head were mounted into a wood handle, the shaft was inserted, and while applying pressure, the mill head was rotated against the blank, removing very slight amounts of blank material. I could tell when I had removed enough because the end of the brass was very bright and shiny and there was an ever so slight circular indentation in the ends of the blanks.
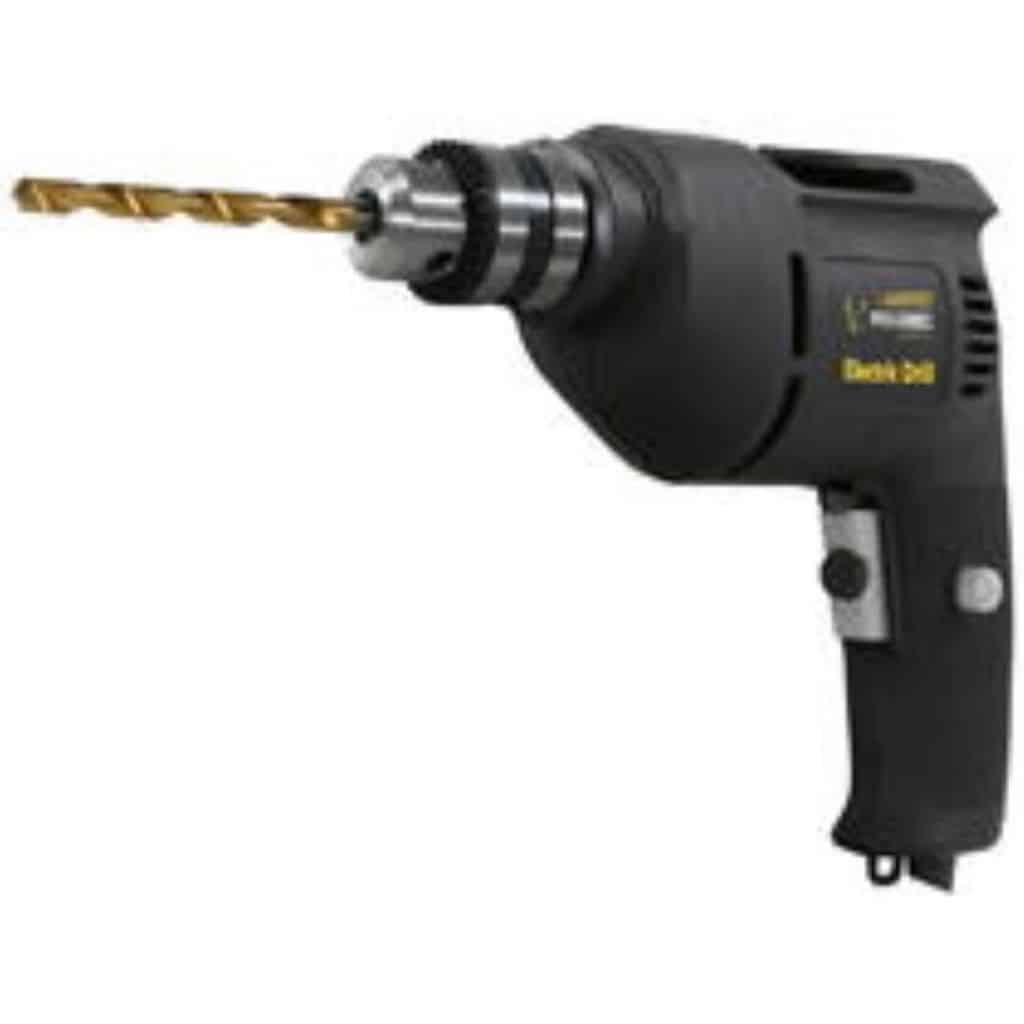
End Milling with a Hand-Held Power Drill
I have heard people using a power hand drill instead of a drill press for the end milling process. This method makes me nervous. Even if the blank is securely clamped in a bench vise, I am not convinced that a pen maker can ensure that the angle of attack will be completely level. End milling that is not completely level, completely perpendicular, to the ends of the blanks is useless and will ruin the blank. Using a drill press that is in proper working order eliminates this concern. Again, if this method works for you, then by all means use it. I don’t claim to be a pen making prophet who has not only all the answers but also the only answers. If it works, it works.
End Milling with a Lathe
I have also heard of pen makers who use the lathe with a drill chuck head in the tail stock, into which they insert the mill, with the blank in some form of chuck on the headstock, quite possibly one of the two chucks I detailed in the post on drilling. I have toyed with this idea but I have chosen not to use it. My reasoning is that sometimes, despite every effort, the bore is not perfectly straight or perfectly centered. When that is the case, and it often is, I don’t trust that I can achieve the perfect alignment of mill cutter shaft and brass tube. With the blank locked in a chuck there will be no forgiveness.
End Milling with a Drill Press
In my shop now, I mount the cutter heads into the drill press drill chuck head and use its power instead of my hands. It is much easier! Because I am going to use this power method, I tend to cut my blanks a bit longer because I know I will mill it off and I have a margin for error. I try not to have my blanks over-sized by a great deal, never more than 1/8 to 1/16 inches but it is common to have small pieces of material standing up from the corners of the blanks. No worries, it all turns off in the process regardless of what it looks like to start with.

Grizzly Drill Press
Be Careful with the Brass Tube
I have had great, by no means 100% perfect, but still great, success in using the drill press for the milling operation and this use is the only reason I maintain a drill press in my shop any longer. I clamp my blank in the Jorgensen wooden clamp that I used to use for the boring process. I set my drill press for a low RPM, about 300 at most. I align the bore of the blank as carefully as possible with the shaft of the milling tool and lower the shaft into the brass tube. This requires care because if the mill shaft is slightly misaligned it can and will tear the brass from the very tip of the blank and this can be disastrous. Again, the pen hardware requires a tight press fit and that fit is based on the brass being intact. Sometimes, if only a tiny piece of brass is missing or deformed in the milling process, you MIGHT get away with it, but it doesn’t require much to be missing to cause the pen hardware to be too loose and for the pen to fail. Test the alignment with the power off first and then proceed slowly.
Start the Cut Carefully
Once the mill shaft is in the tube I still move slowly to allow the shaft to remove the glue and to avoid abrupt contact of the mill head with the blank. Some woods, or other materials, that are particularly brittle, or that have natural layering, as most all wood does, might break or peel when the mill cutter head first makes contact if the speed of the drill press is too fast or if the mill cutter head is being lowered too quickly. Take your time and have patience.
Am I Done Yet?
Once the cutting has started I pull the cutter head off the blank fairly frequently to ensure that I have cut enough (remember, I am looking for a very bright and even ring of gleaming brass to show) but not too much. Again, there is little tolerance built into the pen hardware and the blanks need to remain the specified size. Some pen makers claim that you shouldn’t cut any of the brass, but I disagree in that I find it the only truly reliable way to know for certain that I have cut enough, but I do specify that the amount of brass cut should be absolutely minimal. Just enough to leave a bright edge should be removed. Sometimes the brass shavings are visible but most of the time I raise and lower the cutter head frequently to gauge the cut and to determine when enough is enough. Once one end is milled, I remove the blank from the clamp, turn the blank over, and mill the other end.
Final Thoughts
For me, end milling the blanks can be a bit nerve wracking because I have put a pretty decent amount of time and effort into each blank by this point and I know from experience that end milling, especially with power tools, can be a risky process. But because I usually make a fairly large number of pens at any one time and because my hands don’t reliably cooperate because of the neuropathy, using the drill press is the best solution I have found for the end milling process. With practice, patience, and the use of the right size cutter head, I have a high rate of success with the process, although I do emphasize the importance of practice, more practice, and patience. No matter what step of any process you are engaged in, I truly believe that practice is the most essential element. Even the best and most expensive tools will never substitute for hands-on practice and experience. That means, of course, that in the beginning there will be accidents and mishaps, but each one of those has to be taken as a learning experience. If you learn from it, if you learn what happened and how to prevent it, or if you discover the method that works best for you, then it will have been worth it.
Next Steps
Once each blank is milled, I set it aside. Now I am ready for the most fun and creative part of the entire process: turning the blanks to round, then final shape and size. That process is the topic of the next installment of this series.