As Christmas/Hanukkah gifts for three very special people this year, I decided to commit to making each of them a set of pepper and salt mills, grinders if you will, from pieces of matching wood, or at least using wood that was the same species, for each individual mill. This meant that I was committing to making a total of six mills. In my entire wood turning experience prior to this, I had made a total of four mills, and each time I made those I had expert assistance and advice from my Dad, my guru and teacher of all things wood turning.
The Motivation
I only made the decision to try this experiment because while looking through the Louisville, Kentucky Woodcraft store, I noticed that they were selling pre-drilled mill blanks in 12″ and 8″ sizes in woods that included Black Walnut, Cherry, and Sycamore. I bought a 12″ and an 8″ blank in each of the three woods, at a cost ranging from $39.99 for a 12″ Black Walnut down to $17.99 for the 8″ Cherry and Sycamore blanks. I carried the blanks home with me and added the making of the finished mills to my fairly extensive Christmas lathe work list.
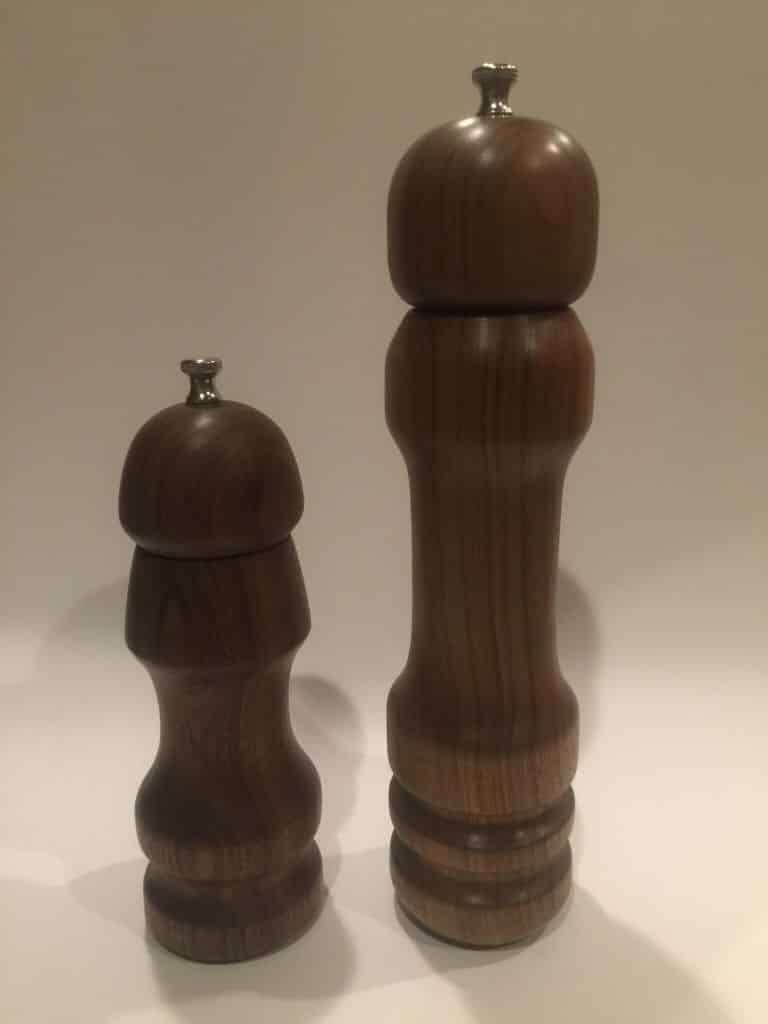
Black Walnut Pepper and Salt Mills
Previous Experience
In the past, the most onerous part of the mill making process was without doubt the three drilling operations required. Depending on the kit one is using, the cap is drilled with a reasonable size bore, 9/32″ in the kit I was using, but the body is drilled twice with much larger bores. The main body must be drilled completely through with a 1 and 1/16″ Forstner type drill bit. If you are proposing to make a full 12″ pepper mill, this requires at a minimum an extension bar for the bore. The process is SLOW. The chips must be cleared every fraction of an inch to prevent seizing and the loss of a potentially very expensive bit, extension bar, and blank. I have, on smaller 8″ mill blanks, been able to drill from both ends because the cleanness of the center bore isn’t relevant because it only forms the storage area for the un-ground pepper or salt, so a nice pretty bore isn’t relevant. But you have to hope you meet more or less in the middle and that is nerve-wracking. Then, to accommodate the grinder hardware, a final 1 and 5/8″ bore is counter-drilled into the bottom.
Whew! All that drilling takes up a great deal of time, set up, and always has the potential for total disaster. The use of pre-drilled blanks made the whole process quite reasonable.
My Own Detailed Instructions
The mill kits come with instructions, but they are not exactly detailed. With the benefit of my Dad’s experience and acumen in all things wood working, we created a very detailed step-by-step process through trial and some error that I referred to consistently. All told, there are 13 distinct steps we identified. But, because I didn’t have to make the bores, it was a less lengthy process for me.
The Process of Making Six Pepper and Salt Mills
I did have to re-bore the cap pieces because the maker didn’t drill them to the size required for the hardware in the kits, even though that same hardware was sold by the same vendor selling the blank. But drilling the cap was easy compared to the body, which I did not have to re-work at all.
The mill body was mounted between a small 35mm Nova Chuck on the head stock and a large live center on the tail stock and turned to shape, sanded, and finished. The cap was first turned between centers and then the interior tenon was cut. That tenon could then be held in the 35mm Nova Chuck with ease, making final shaping, sanding, and finishing quite simple.

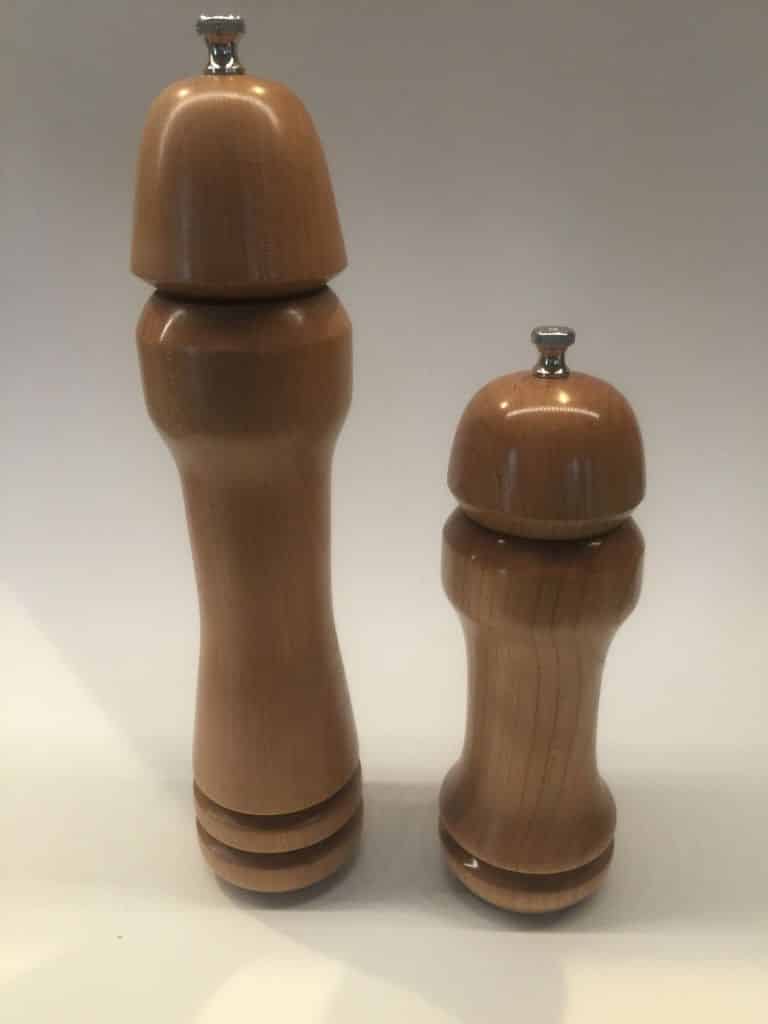
Sycamore Pepper and Salt Mills
Assembly of the Mills and a Bit of a Problem
Then comes time for the assembly! The salt mill blanks were designed for 8″ mill hardware, which meant that the blank was actually cut to 9″ length. This extra 1″ is NECESSARY to accommodate the counter-drilled bottom, the internal tenon, and some loss when turning the cap. One extra inch is more than enough to compensate and in fact, I had to be more aggressive in turning down the cap than I really wanted to. But, the blanks sold for use with a 12″ mill were exactly 12″ long! So, when the counter-drilling in the bottom and the internal tenon are taken into account, the internal aluminum rod required for the mill to operate is too long by about 1/4″.
But, no panic, I knew what to do from prior experience. I used a hacksaw to saw off the non-threaded end of the aluminum rod, then I peened the end back down so that it would hold in the mechanism. That part of the rod isn’t too pretty, but there is zero reason anyone should ever see it unless they take the entire mill apart.
I was able to produce up to two mills in one day, but that was pushing it for me. I found the pace of one mill per day, requiring no more than 3 hours of effort at the most, to be my preferred speed. Because the interior drilling had already been done, the most complicated part was the assembly which relies on very small diameter, but ridiculously long, screws. Why the screws are so long when they do not bear any actual weight completely baffles me.
Cherry Pepper and Salt Mills
Impressions
I am honestly quite pleased with the outcome of the mills both because I think they look nice but also because I was so nervous about taking on this task without my Dad being here to continue to mentor me through the process. I have gained a good deal of confidence as a consequence of making these six mills and I look forward to making more in the future for other friends and family.
I wish all my readers well and for those who are fans of the lathe, do a good turn today!