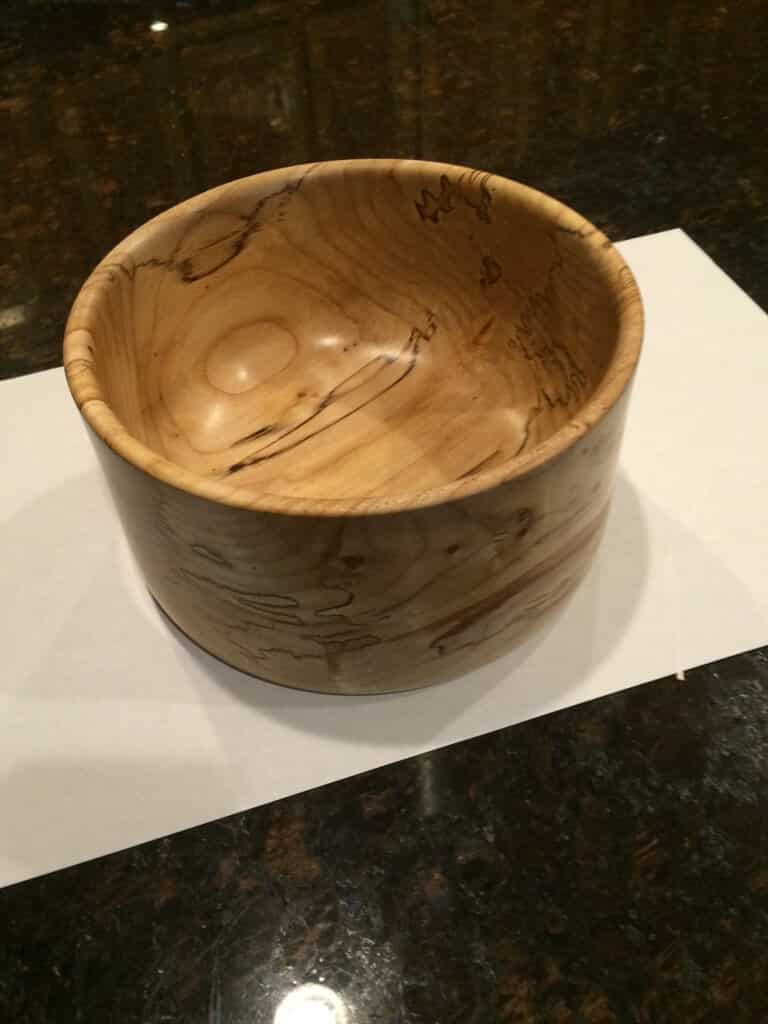
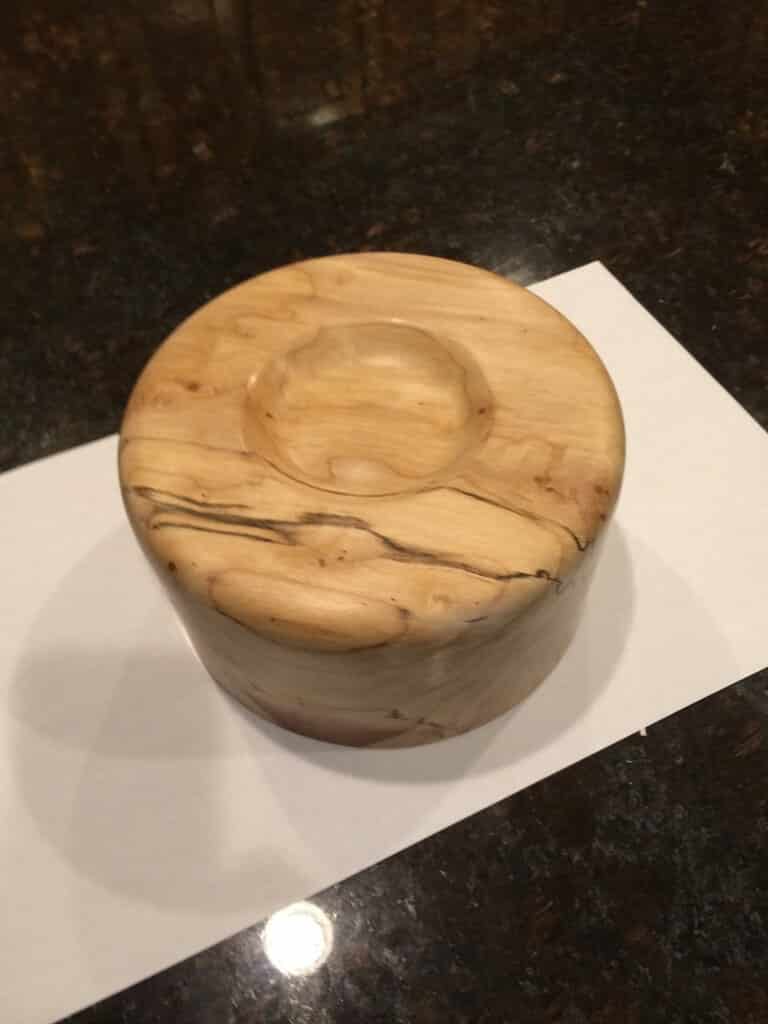
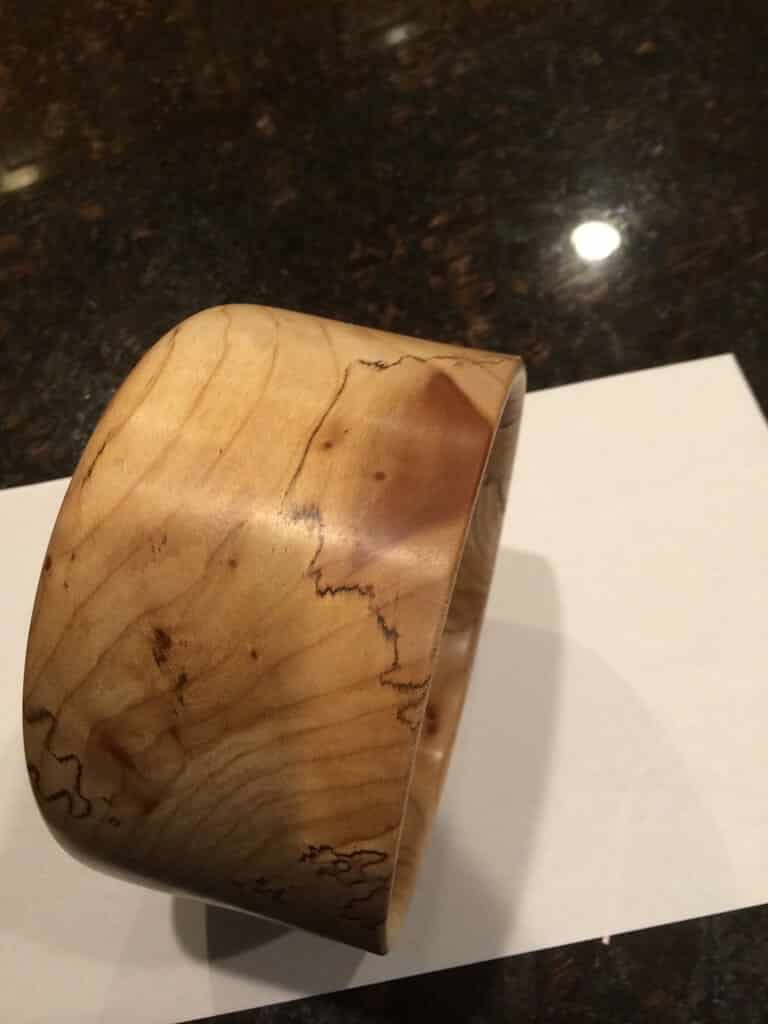
Maple Burl
I had a piece of wood that I had marked as “maple burl,” which I had obtained at some now unknown time and place. The wood was obviously also spalted which added to the interest of the uncut piece. The spalting became more pronounced and evident once it was cut to round on the band saw. Other than the spalting, the piece suffered from none of the irregularities or weaknesses often found in burl wood or spalted material. Perhaps the innate strength of maple served it well to prevent these common problems in these otherwise often stunning but problematic pieces of wood material.
About Burls
Burl wood can occur anywhere the tree has suffered a physical injury or disease. It can occur both above and below the ground line. Burl wood is often considered beautiful and desirable because the grain is typical twisted and twirled into fantastic figures and design. However, despite its natural beauty, burl wood can be quite difficult to work with hand tools or on the lathe due to the very same factors that make is so visually desirable. The twisted grain can cause weakness in the wood, making it prone to cracks and breakage during working, especially during turning on the lathe.
About Spalting
Spalting is another natural process by which the wood is partially rotted and/or infected with fungus. This causes the appearance of black streaks and lines. Spalting can vary widely in its degree from mild to extreme and in some weaker woods, or in woods that are severely affected, the spalting causes the wood to be completely unworkable to the point of simply disintegrating from a lack of structural integrity due to the weakness of the areas affected by rot and fungus.
A Bit About Maple
Maple in an inherently strong wood, although I should be clear that I am referring to hard maple as opposed to other members of the Acer species which can be quite soft while still being referred to as maple. Generally, hard maple comes from the sugar maple common to the northeastern United States. This piece of spalted maple burl was clearly of the hard maple variety. The wood was quite hard and therefore cut beautifully, quite unlike the softer maples which tend to cut with a ragged finish, although due the softness of the wood, this is quite easily sanded away after initial cutting is complete.
I measured the moisture content of the wood at about 12% prior to working with it as I thought I could detect some dampness with my hands, but this evidently wasn’t the case. 12% moisture content is consistent with wood that is considered thoroughly dried and ready to work, although a recently tested piece of walnut proved to be even drier at between 9% and 6% depending on where the measure was taken.
The Turning Process
The blank rounded easily as it was fairly evenly cut on the bandsaw. While the wood was hard, it cut quite nicely with relatively new carbide cutting inserts in the Easy Wood Tool line rougher and finisher. I am typically able to complete an entire piece without using any tool other than the two Easy Wood tools, although I do use an oval skew to help create the small divot in the bottom of the piece to insert the Teknatool SuperNova 2 chuck.
My ability to achieve results that are pleasing to me and within the scope of what I find acceptable seems to have increased markedly in recent times and I have wondered why this might be. I think that I have developed an ability to be more patient with the work and to use my tools to make very light finishing cuts prior to the sanding step that make the incidence of end grain tear out and other roughness much less significant than has been the case in the past. The rough “hogging” cuts that are necessary in the beginning will not leave a nice finish, but these rough areas can often be removed with very light cuts, even using the same tools used for roughing out the bowl. The effect is all in the degree of pressure and control used to make the cut. In this case, it really is the user, not the tool.
The Nitty Gritty on Sanding
I know some wood turners who claim that they never have to sand since they achieve such fine cuts with very sharp tools that it is unnecessary. I don’t know that I completely believe this, or perhaps their standards of smoothness and “touchability” are lower than mine. I think that a nicely made bowl practically “asks” an observer to touch it, and for me anything other than a finish close to satiny that feels delightful against the fingers isn’t acceptable. To achieve this, I routinely sand down to 800 grit paper, although admittedly most sanding prior to that level is done with Abranet screens rather than traditional sandpaper. I find that Abranet screens cut faster and last considerably longer with no clogging or loading compared to any paper-based product I have ever tried.
Sanding, I think, is an art practically unto itself. It seems simple enough but I think it is possible to sand incorrectly and have unpleasant results as a consequence, just as it is possible to misuse any wood working tool, power or not. I read recently, in a publication I have now forgotten, that a very light touch was all that was necessary, or even desirable, when sanding. If the wood is hot to the touch then the pressure was too great and results will be marginal. This seemed counter-intuitive to me since surely more pressure must increase the cut of the sandpaper! But I took the advice to heart and I have found it to be absolutely accurate. A light touch with the paper results in a fast and very nice finish with considerably less effort than I have ever had to expend before. The newly developed ability to make very light finishing cuts with either a rougher or finisher from the Easy Tool line and a light touch with the sanding screens or paper have made a world of difference in my ability to produce a nice finished product with a minimum amount of fuss, time, or effort. I can complete a nice bowl or dish in about 2 to 4 hours, making a bowl a day a reasonable proposition.
The Finishing Touches
Once the maple burl piece was cut and sanded I had to make a decision about finish. I knew from experience that maple would not take any color in a finish, and I felt confident that due to the hardness of maple that any oil-based finish would run the risk of not soaking in and therefore remaining on the surface, meaning it might not dry nicely and could remain uneven or possibly tacky to the touch. I tried a new wax based product, Odie’s Wax, which is in appearance a paste wax with the slightest tint. I followed the simple instructions: wipe on sparingly, let set for 30 minutes and then buff. I used simple cotton rags for both the wiping and the buffing and was quite pleased with the result. The finish is smooth and nice to the touch with no evidence of tackiness, the shine is subtle but distinctive, and the process was quite simple. I would use Odie’s Wax again on particularly hard woods in the future.
Overall, I am quite pleased with the results of using this piece of spalted maple burl. I would recommend that anyone able to find such a piece give it a turn!